
Image Colorization with OpenCV
1. Introduction
Black-and-white images contain only brightness information, without the original colors. Image colorization is the process of adding realistic colors to grayscale or black-and-white images. Traditionally, this process required manual editing using image-processing software. However, with the development of Deep Learning, computers can automatically predict suitable colors for different parts of an image.
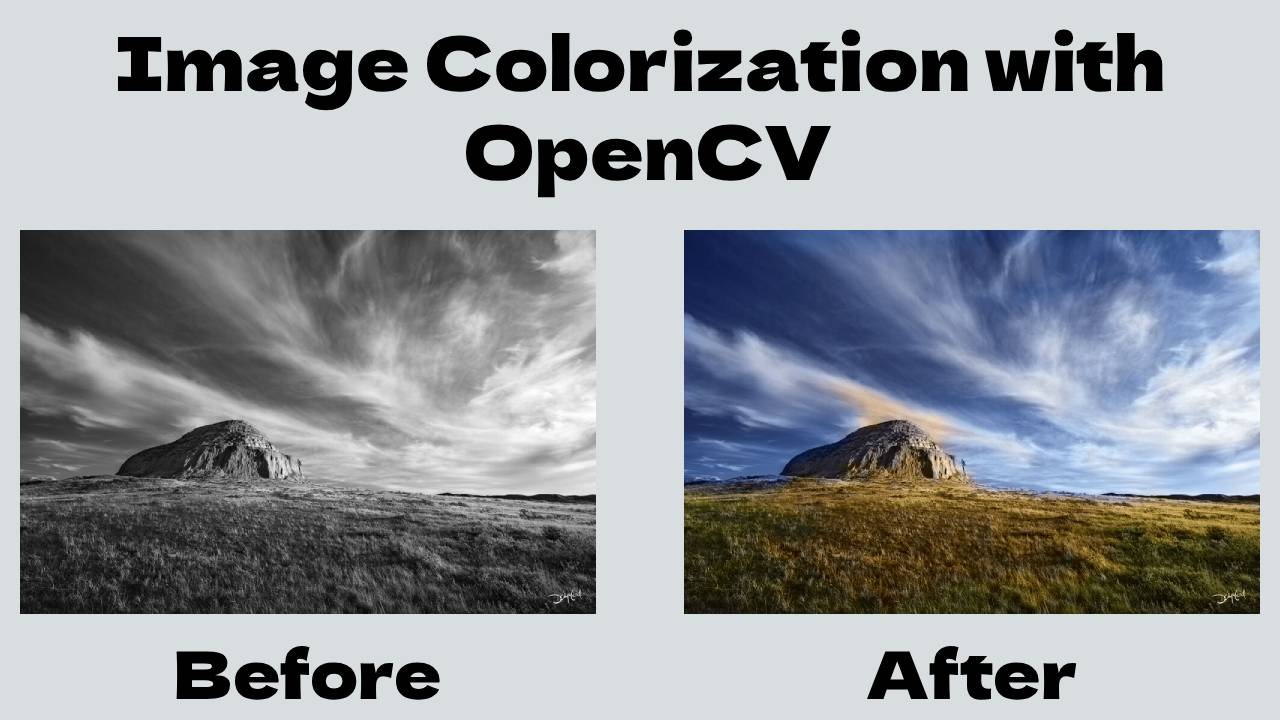
This project uses OpenCV and Deep Learning to convert a black-and-white image into a colorized image. A pre-trained neural network is used to analyze the grayscale image and predict appropriate colors automatically.
The system uses a pre-trained colorization model based on a deep neural network. The model works with the LAB color space, where the L channel represents brightness and the A and B channels represent color information. The black-and-white image provides the brightness information, while the neural network predicts the missing A and B color channels.
The final predicted color channels are combined with the original brightness channel to generate a color image.
2. Objective
The main objective of this project is to develop a simple image colorization system using OpenCV and a pre-trained Deep Learning model.
The project aims to:
Load a black-and-white image.
Process the image using OpenCV.
Convert the image into the LAB color space.
Extract the brightness information.
Use a pre-trained neural network to predict color information.
Combine the predicted colors with the brightness channel.
Convert the result back into a normal color image.
Display the original and colorized images.
3. Technologies Used
The main technologies used in this project are:
Python – Programming language used to implement the project.
OpenCV – Used for image processing and displaying images.
NumPy – Used for numerical operations and processing the model data.
Deep Learning – Used to predict suitable colors for the grayscale image.
Caffe Model – The pre-trained neural network model used for image colorization.
4. Deep Learning Model
The project uses a pre-trained colorization model consisting of three important files:
colorization_deploy_v2.prototxt– Contains the neural network architecture.colorization_release_v2.caffemodel– Contains the trained weights of the neural network.pts_in_hull.npy– Contains the color cluster points used by the model.
The model does not need to be trained again for this project because it has already been trained using a large collection of images. The trained model can therefore directly analyze a new black-and-white image and predict its color information.
5. Python Implementation
The following Python program loads the pre-trained Deep Learning model and uses it to colorize a black-and-white image.
import cv2
import numpy as np

# Load model files

prototxt = "colorization_deploy_v2.prototxt"
model = "colorization_release_v2.caffemodel"
points = "pts_in_hull.npy"

# Load the neural network

net = cv2.dnn.readNetFromCaffe(prototxt, model)
pts = np.load(points)

# Get layer IDs

class8 = net.getLayerId("class8_ab")
conv8 = net.getLayerId("conv8_313_rh")

# Prepare cluster points

pts = pts.transpose().reshape(2, 313, 1, 1)

# Add color information to the network

net.getLayer(class8).blobs = [pts.astype("float32")]

net.getLayer(conv8).blobs = [
    np.full([1, 313], 2.606, dtype="float32")
]

# Load the black-and-white image

image = cv2.imread("black_white.jpg")

# Convert image into LAB color format

scaled = image.astype("float32") / 255.0
lab = cv2.cvtColor(scaled, cv2.COLOR_BGR2LAB)

# Extract brightness channel

L = cv2.split(lab)[0]

# Resize image for the model

L_resized = cv2.resize(L, (224, 224))
L_resized -= 50

# Pass image to the model

net.setInput(cv2.dnn.blobFromImage(L_resized))

# Predict color channels

ab = net.forward()[0, :, :, :]

# Resize predicted colors

ab = ab.transpose((1, 2, 0))
ab = cv2.resize(ab, (image.shape[1], image.shape[0]))

# Combine brightness and colors

colorized = np.concatenate(
    (L[:, :, np.newaxis], ab),
    axis=2
)

# Convert LAB to BGR

colorized = cv2.cvtColor(
    colorized,
    cv2.COLOR_LAB2BGR
)

# Limit pixel values

colorized = np.clip(colorized, 0, 1)

# Convert to integer values

colorized = (255 * colorized).astype("uint8")

# Show images

cv2.imshow("Original", image)
cv2.imshow("Colorized", colorized)

cv2.waitKey(0)
cv2.destroyAllWindows()
6. Explanation of the Python Program
First, the required libraries, OpenCV and NumPy, are imported. OpenCV provides image-processing functions and the Deep Learning module, while NumPy is used to handle numerical data and the model's color information.
The program then loads the three required model files. The readNetFromCaffe() function loads the pre-trained Caffe neural network. The pts_in_hull.npy file is also loaded using NumPy.
Next, the program obtains the IDs of the neural network layers responsible for predicting the A and B color channels. The color cluster points are then prepared and added to the network.
The black-and-white image is loaded using cv2.imread(). The image is scaled and converted from the BGR color format to the LAB color space.
In LAB color space, the L channel represents lightness or brightness, while the A and B channels contain color information. Since the original image is black and white, the L channel provides the brightness information that the neural network needs.
The L channel is resized to 224 × 224 pixels, which is the input size expected by the model. It is then provided to the neural network.
The Deep Learning model processes the image and predicts the missing A and B color channels. These predicted channels are resized to the original image dimensions.
The original L channel and the predicted A and B channels are then combined. The resulting LAB image is converted back into the BGR color format used by OpenCV.
Finally, the pixel values are limited to a valid range and converted into 8-bit integer values. The program displays both the original black-and-white image and the colorized image.
7. Output
When the program is executed, two windows are displayed:
Original
[Black-and-White Image]

Colorized
[Colorized Image]
The Original window displays the input black-and-white image, while the Colorized window displays the image after the Deep Learning model has predicted and added colors.
The exact colorized result depends on the input image. The model automatically predicts colors based on the visual patterns and objects present in the image.
8. How the System Works
The overall process can be summarized as follows:
Black-and-White Image → LAB Conversion → Extract L Channel → Deep Learning Model → Predict A/B Channels → Combine Channels → Convert to BGR → Colorized Image
The model does not simply apply a fixed color to every pixel. Instead, it uses patterns learned during training to estimate appropriate colors. For example, it may recognize regions that appear to be sky, vegetation, buildings, people, or other objects and predict colors that are visually appropriate for those regions.
9. Advantages
This approach has several advantages:
It automatically colorizes images without manual editing.
It uses a pre-trained Deep Learning model.
It can process different types of black-and-white images.
OpenCV provides efficient image-processing functionality.
The system can be implemented using relatively simple Python code.
10. Conclusion
Black-and-White Image Colorization using OpenCV and Deep Learning demonstrates how Artificial Intelligence can be used to restore or enhance old grayscale images. Instead of manually selecting colors, the pre-trained neural network analyzes the image and predicts suitable color information.
The project also provides a practical understanding of image processing, LAB color space, neural networks, pre-trained models, and computer vision. Although the model can produce impressive results, the predicted colors may not always match the original colors of an image because the original color information is not available. Nevertheless, Deep Learning provides an effective way to generate realistic and visually meaningful colorized images automatically.